So you’ve purchased our beautiful, fully coded Real Estate iPhone App Template (or you are looking to buy it), and now it’s time to personalize it for your real estate business, by making custom changes here and there, as well as populating categories, filters and real estate items with your own offerings. This tutorial gives you all the details you need to publish the perfect real estate app to the App Store.
Overview
On a high-level, you have downloaded the Swift source code, that represents the code you will be submitting to Apple. The app template is wired to a Firebase backend, where all the dynamic data is stored. The app is automatically fetching the data from there. The downloaded archive is hooked to a mock Firebase database, which we provide for our demos. To publish your app to App Store, follow these steps, in order:
- Create a free Firebase app
- Add all your data (categories, real estate listings and filters) into the created Firebase database
- Wire up your Firebase Database to the downloaded real estate iOS app template
- Publish the app template to App Store
1. Run the iOS app template in Xcode
If you’re a pro, just update the pods and run the .xcworkspace in Xcode. If you’re a newbie like many of us, follow our detailed tutorial on how to do it step by step.
2. Link the app to your own Firebase account
Again, if you’re a pro, just replace the GoogleService-Info.plist file with your own. Click here for a detailed tutorial on how to achieve this.
3. Add Your Real Estate Properties to Your Firebase Account
3.1. Add Your Categories
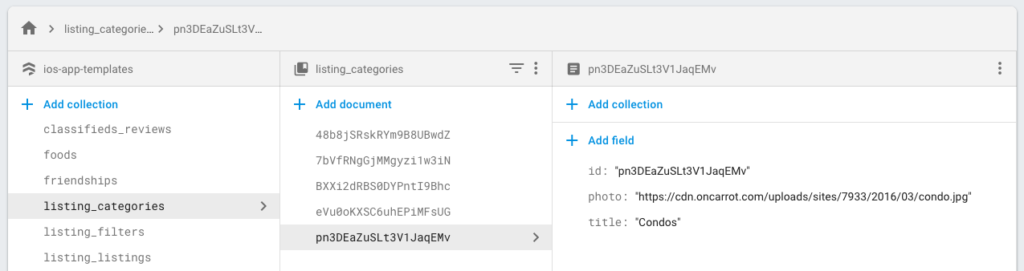
Go to Firebase Console -> Database -> Cloud Firestore and add a collection named “listing_categories“, containing all the categories you want to be displayed within the app. Make sure you fill out all the required fields (id, photo, title) and you make no typos. The ID also needs to match the document ID from the second column – it can be auto-generated.
3.2 Add Your Filters
The next step in making your real estate app for iOS is to add your own advanced filters in the Firebase database. For this, you’re going to create a new collection in Cloud Firestore named “listing_filters“. These will be the filters displayed in the app and they serve for advanced searching as well as the Extra Info section on the property details screen. Again, make sure you provide all the required fields (id, name, options – this is an array of strings), by specifying all the options for a given filter. Take a look at the example below:
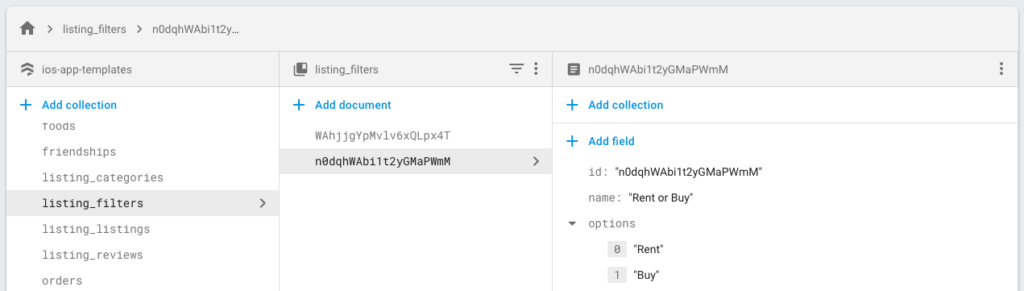
Again, double check that the ID of the filters matches the Document ID in the second column.
At this point, after re-running the app in Xcode, you should be seeing the categories and filters you’ve just added. Give it a shot. Well done!
3.3. Add Your Property Listings
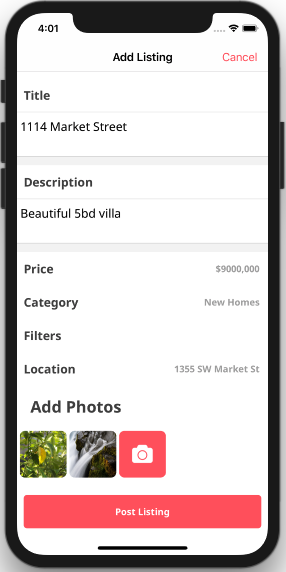
To add your properties, you can use the app directly. Assuming you already completed steps 1. and 2. from above, you can run the app in Xcode and successfully see your categories & filters. Now, you can simply add a new listing by clicking the compose button, filling out all the fields and submitting the form.
Once you press “Post Listing“, you’ll get a success message. Refresh your Firebase Console page and you should be seeing a new collection, that was added automatically, named “listing_listings“. It will contain all the data you’ve submitted from the app. The collection will look like this:
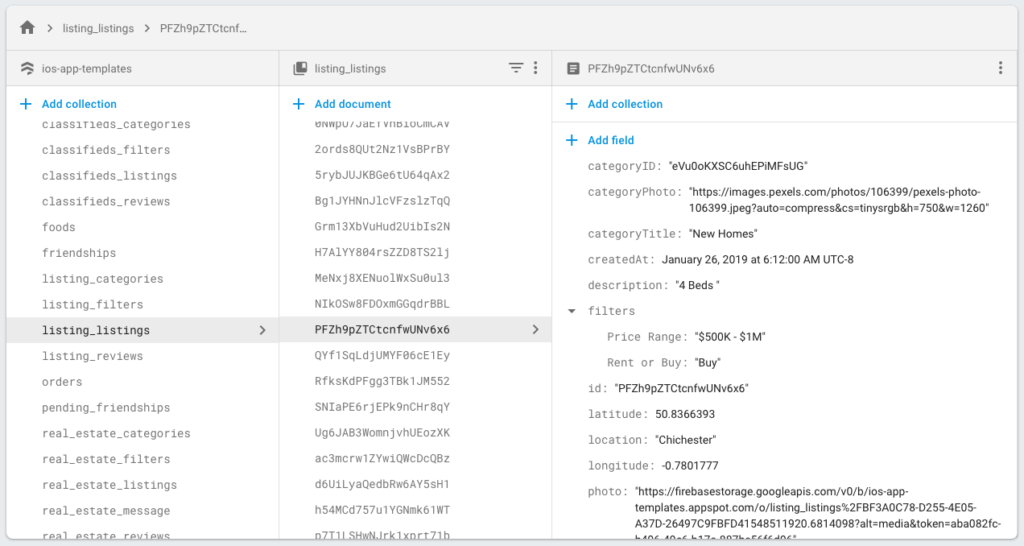
Keep on adding all your real estate items. Once finished, you can submit your app to the App Store, directly from Xcode.
Note: You can always update your Firestore database items, without having to re-submit the app to the App Store, since the data it’s dynamically retrieved from the backend.
4. Make Further Customizations to Your Real Estate App
4.1. How to change the category of the items listed in the grid view on the home screen?
Open ListingApp/RealEstateSettingsProvider.swift file and modify the category id attribute of the homeGridViewServerCategory field:

You must get the category ID from Firebase (added at step 3.1) – make sure it is valid.
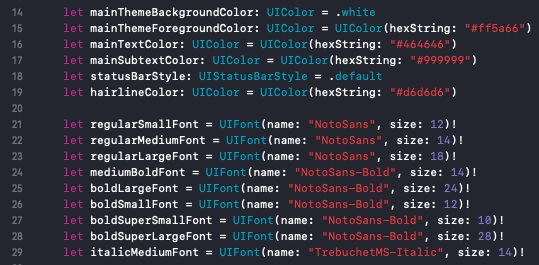
4.2. How do I change colors, fonts, and icons?
Our app is highly-modularized, so changing colors, fonts and icons take minimal effort. All you need to do is modify the UI configuration file, which can be found in Core/Listing/Themes/Airbnb/ATCListingUIConfiguration.swift
In the case of an icon, make sure you first add the image to Assets.xcassets collection (by drag and drop in Xcode) and then only specify the name in ATCListingUIConfiguration.swift file.
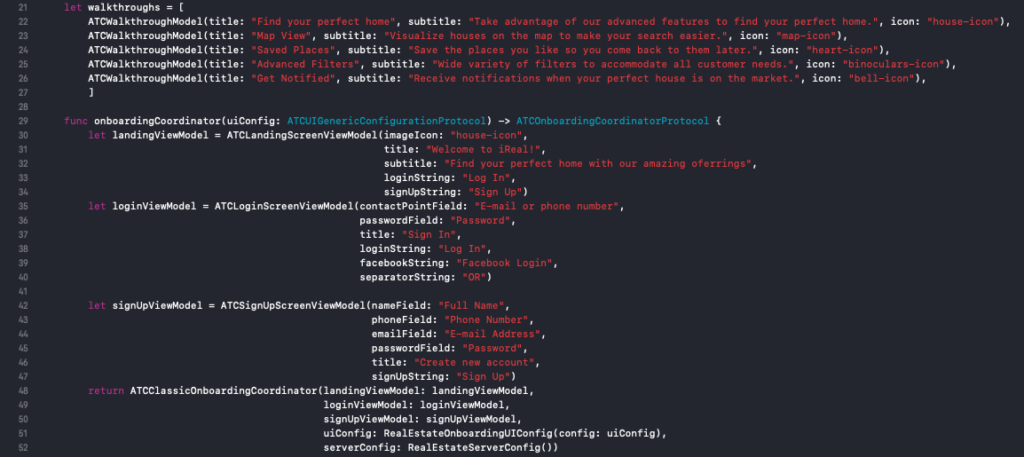
4.3. How to customize Onboarding Screens?
In the ListingApp/RealEstateSettingsProvider.swift file, you can see the list of fields describing all of the onboarding screens: walkthroughs, landing, log in and sign up. Modify the colors, copy, and icons, add or remove walkthrough screens, etc. In fact, most of the stuff you’ll want to customize lives in this file, including the Firebase collection names.
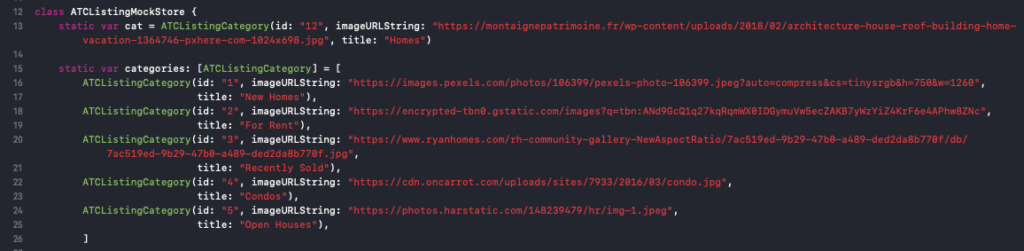
4.4. How to disable Firebase and use a static hard-coded list of real estate items?
In the RealEstateSettingsProvider.swift file, change the values of isFirebaseDatabaseEnabled and isFirebaseAuthEnabled to false. In that case, the app will show the static data that are specified in Core/Listing/MockStore/ATCListingMockStore.swift file: