Ecommerce Mobile App Development
In this article, we are going to walk you through how to make your brand new e-commerce mobile app template in Swift, by leveraging our flagship shopping app template for iOS. Our mission at iosapptemplates.com is to significantly reduce friction and cost for ecommerce mobile app development by providing high-quality templates with full source code.
While there’s no coding required to get the app up and running, you will need a few iOS development tools, such as Xcode and Cocoapods. In this tutorial we assume this might be your first iOS app, so we provide links with detailed resources on each step.
Regardless of your expertise level, you’ll be able to navigate the ecommerce mobile app development process since most of the remaining work is non-coding: wiring your Stripe & Firebase accounts, adding products, and customizing branding.
Here’s an overview of the steps you need to follow to make your own e-commerce app:
- Install the Cocoapods dependencies
- Run the project in Xcode
- Link the project to your own Firebase account
- Add your own categories & products to your Firebase Firestore database
- Link the project to your own Stripe account to accept payments
- (Optional) Link to your Apple Pay Merchant ID
- (Optional) Link your Facebook developer app (for Facebook Login)
- (Optional) Customize the UI: colors, branding, fonts, icons, app icon
- Submit the app to the App Store
1. Run the e-commerce app template in Xcode
If you’re an expert, install the pods and open the .xcworkspace in Xcode. If you’re new, follow our detailed tutorial on how to run an Xcode project with Cocoapods dependencies.
The main pod dependencies used in this template are:
- Facebook SDK – used for Login and Sign Up with Facebook
- Firebase – used for Auth, Firestore and Notifications
- Stripe – for payment integration
- Alamofire – for networking
- Kingfisher – for performant image loading

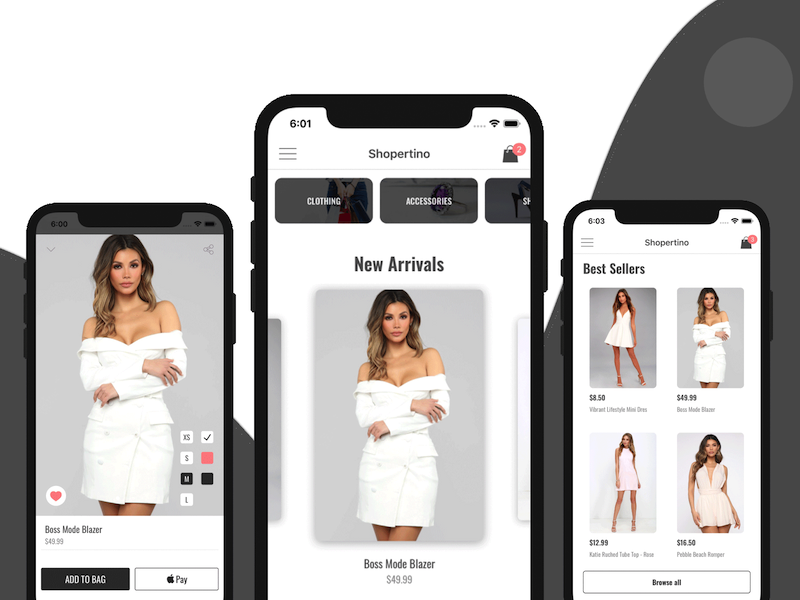
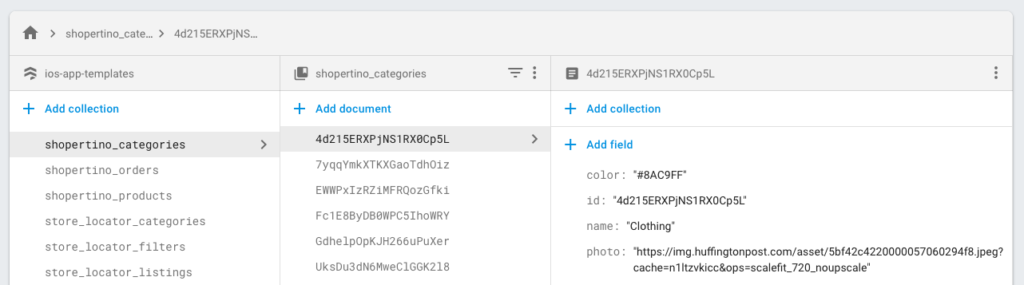
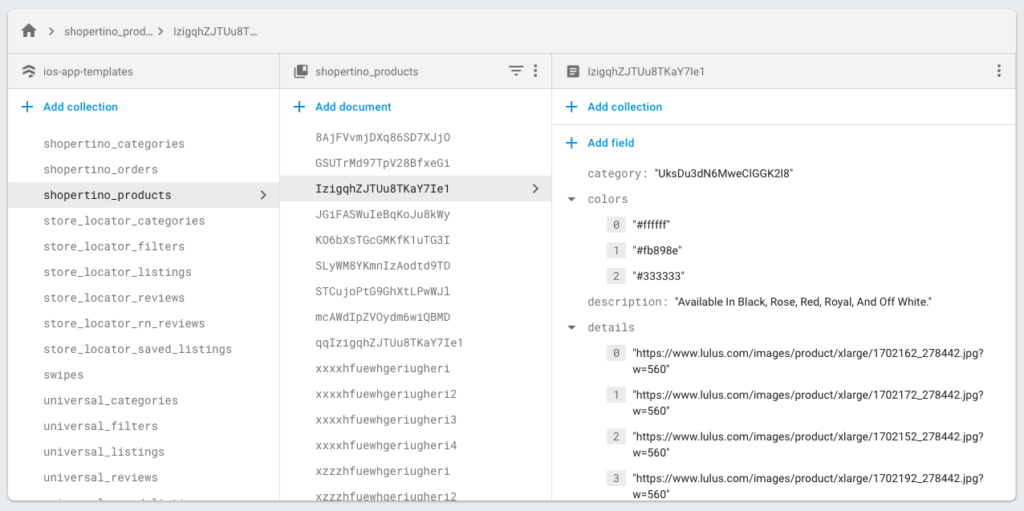
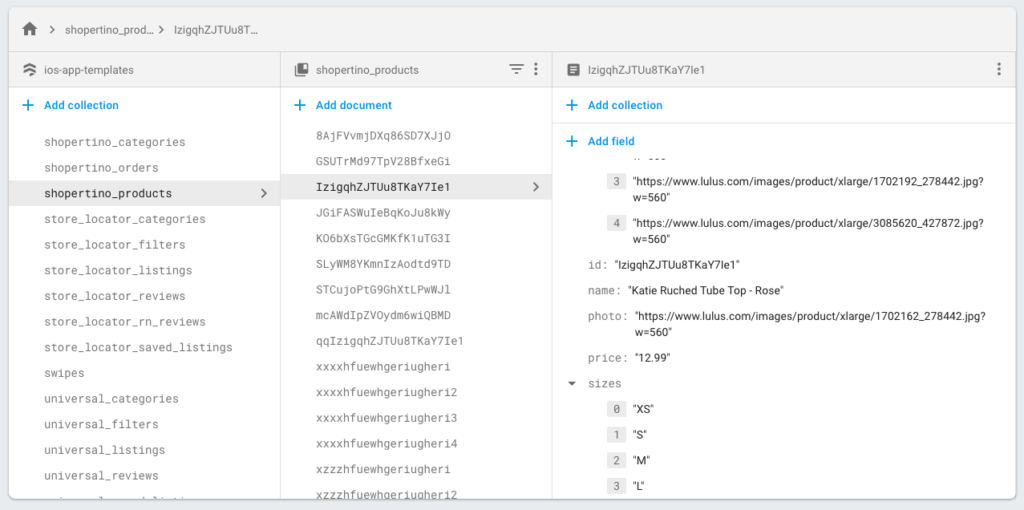
After you run the project, link it to your Firebase backend and populate shopertino_categories and shopertino_products collections with the correct fields (id, name, photo, price, colors, sizes, description, details).
To display the correct products on the home screen, open ShopertinoDataSourceProvider.swift and replace the three category IDs used for the main carousel, the featured carousel, and the grid view with your own.

Now run your app again and verify screens, add products to the bag, and place a test order with card 4242 4242 4242 4242 (future date, any CVC).
4. Link Your Own Stripe Account to Accept Payments
By default the template uses a test Stripe account. Create your Stripe account and obtain the publishable and secret keys under Developers -> API Keys, then configure them in your backend and the app as required.
Congratulations — you’ve completed the ecommerce mobile app setup.