How to Make a Chat App for iOS in SwiftUI
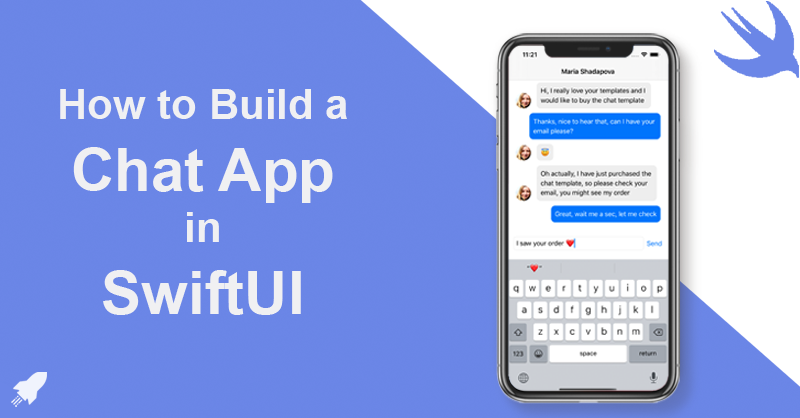
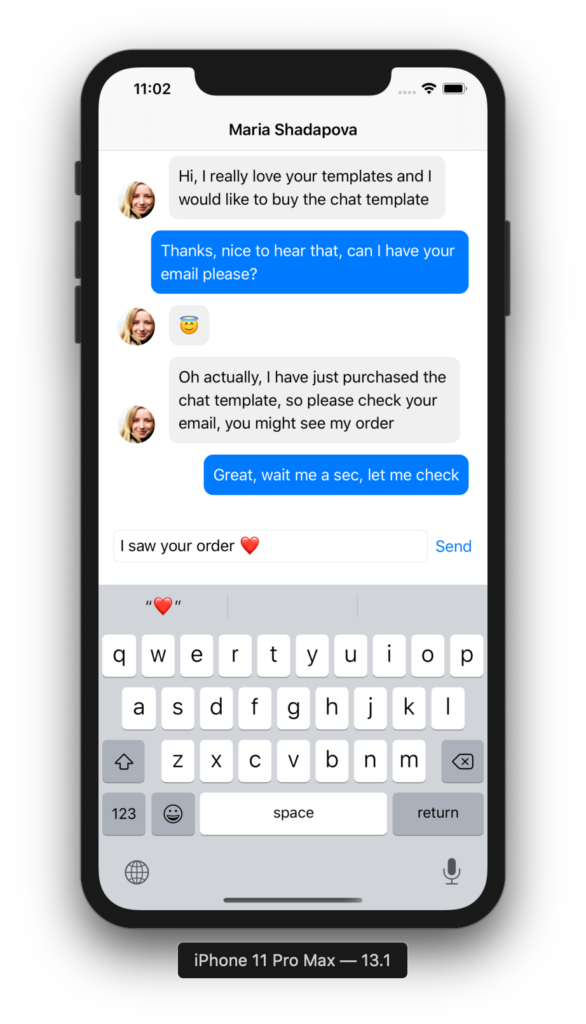
SwiftUI is the modern way of building user interfaces across all Apple platforms. In this tutorial, we are going to learn how to create a chat app in SwiftUI. There are a lot of interesting concepts that need to be engaged in building a SwiftUI chat app, so there's a lot to learn. Here's how your final SwiftUI app will look like at the end of this tutorial:
Since the day SwiftUI was introduced to the public, a lot of articles and tutorials have been starting to show up. Unfortunately, most of the articles are either too theoretical or too simple. And after a certain threshold of basic knowledge, you inevitably run into big problems in the real iOS world of SwiftUI. So in this SwiftUI article, we are going to conduct a tutorial that is applicable in practice: creating a chat screen UI, displaying messages in a chat application built from scratch. Sound similar, right? Our screen is quite simple but will show you how powerful SwiftUI is. To get a fully functional video chat app by saving years of development and hard work, check out our iOS Video Chat app in SwiftUI.
Getting Started
This tutorial is geared toward developers who are fairly familiar with SwiftUI, so this time, the requirements might seem quite advanced. Basic components such as VStack, HStack, modifiers such as padding, borders or properties like @Environment, @State, @PublishedSubject will not be reintroduced. You can check out our previous SwiftUI tutorials, if you want to learn about these concepts. In most cases, you'll be able to understand what they do directly from the context, so no need to really learn the theory upfront. Instead, we will talk about how to use, why use and how to combine these concepts. If you are new to SwiftUI, you should read the following articles before continuing.
- Basic components – SwiftUI Introduction
- Properties: SwiftUI State Management
Besides that, you can read all our SwiftUI tutorials to get the basic knowledge on our blog.
Mega Bundle Sale is ON! Get ALL of our React Native codebases at 90% OFF discount 🔥
Get the Mega BundleBuilding a SwiftUI Chat App for iOS
The business logic and the data flow will be very basic, to keep the article as simple as possible. It consists of 3 parts:
- Part 1: Model layer – Business logic code for the models
- Part 2: UI Layer – The chat message cell
- Part 3: Controller layer – Message view controller
1. Implementing the Model Layer
In this SwiftUI tutorial, we have two models with the most basic properties.
- User with a name, an avatar and a variable to check whether it is the current user. In fact, this User class will need a lot of other parameters. But as said, these 3 properties are enough for this purpose of this SwiftUI tutorial.
- Message stores the content of the message and who owns it.
struct Message {
    var content: String
    var user: User
}

struct User {
    var name: String
    var avatar: String
    var isCurrentUser: Bool = false
}
Additonally, we have instantiated a few models to showcase the behavior of the SwiftUI chat app. You can think about that as mocking data. In general there are many ways to establish relationships between users and messages (even in actual projects) but this is the easiest way to help you understand it.
2. Creating the Views – UI Layer
Apple encourages us to create as many views as we need, to keep the code easy to read and maintain. Reusable views are greatly recommended. So let's keep this in mind every time we write UI code, and implicitly SwiftUI code. But first, let's paint the whole process before we get started:
- We will have a screen containing messages.
- Corresponding to each message, we will have 2 views representing the content and the avatar, respectively
- If we go into more detail, the content will have a background and font color depending on the type of user, and the remaining modifiers will be the same.
Thus, we will have 3 views – in order from small to bigger:
- ContentMessageView
- MessageView – contains ContentMessageView
- ChatView – contains multiple MessageView objects
2.1. ContentMessageView
Okay, now, let's create a SwiftUI file in the User Interface and implement the body part. Let's add a few lines of code as follows:
var body: some View {
    Text("Hello world")
        .padding(10)
        .foregroundColor(Color.white)
        .background(Color.blue)
        .cornerRadius(10)
}
So we have created the UI of the content message view. If you are a newbie, you will definitely be lost for words – just like me before. Although there are many issues, it is undeniable the power of SwiftUI – very clean, neat and easy to understand. We still have a few problems to resolve, the background color and the text color of the content view will depend on the type of user. And of course, the Text's content should not be a hardcoded string. Let's make some changes:
struct ContentMessageView: View {
    var contentMessage: String
    var isCurrentUser: Bool

    var body: some View {
        Text(contentMessage)
            .padding(10)
            .foregroundColor(isCurrentUser ? Color.white : Color.black)
            .background(isCurrentUser ? Color.blue : Color(UIColor(red: 240/255, green: 240/255, blue: 240/255, alpha: 1.0)))
            .cornerRadius(10)
    }
}
Mega Bundle Sale is ON! Get ALL of our React Native codebases at 90% OFF discount 🔥
Get the Mega BundleTo test it, run it in the previews section with some mocking values:
struct ContentMessageView_Previews: PreviewProvider {
    static var previews: some View {
        ContentMessageView(contentMessage: "Hi, I am your friend", isCurrentUser: false)
    }
}

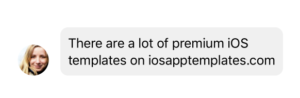
2.2. MessageView
Are you addicted to social networks (specifically Messenger or Whatsapp)? If so, I am sure you will be able to visualize their UI / UX design in your mind. Let's start with the type of user who will receive your message.
- We need an image at the beginning – of course, it is going to be rounded into a circle.
- The content message displays next to the avatar.
Similar to the above, create a SwiftUI file and name it MessageView
var body: some View {
    HStack(alignment: .bottom, spacing: 15) {
        Image("My-avatar")
            .resizable()
            .frame(width: 40, height: 40, alignment: .center)
            .cornerRadius(20)
        ContentMessageView(contentMessage: "There are a lot of premium iOS templates on iosapptemplates.com",
                          isCurrentUser: false)
    }
}
While coding, you can see the UI will be constantly updated in the Canvas view (on the right side). This is one of the most popular SwiftUI features (live previews).
It looks good, right? So what about the sender? According to the current UX, the sender's message will be on the trailing side and no avatar. At this step, we need a variable to check current user information in order to update the UI properly. As a side note, if/else or switch/case conditions can only live in HStack/VStack/Group or similar components. After combining the values and conditions, our code will look like this
struct MessageView : View {
    var currentMessage: Message
    var body: some View {
        HStack(alignment: .bottom, spacing: 15) {
            if !checkedMessage.user.isCurrentUser {
                Image(checkedMessage.user.avatar)
                    .resizable()
                    .frame(width: 40, height: 40, alignment: .center)
                    .cornerRadius(20)
            } else {
                Spacer()
            }
            ContentMessageView(contentMessage: checkedMessage.content,
                              isCurrentUser: checkedMessage.user.isCurrentUser)
        }
    }
}
If you would love to see how it displays, let's update code in the previews section as follows:
struct MessageView_Previews: PreviewProvider {
    static var previews: some View {
        MessageView(currentMessage: Message(content: "There are a lot of premium iOS templates on iosapptemplates.com", user: DataSource.secondUser))
    }
}

Mega Bundle Sale is ON! Get ALL of our React Native codebases at 90% OFF discount 🔥
Get the Mega Bundle3. Chat View
In an actual real Xcode project, the messages will be stored on the server for synchronization between all users. In this tutorial, we are going to simulate the server by using an array function containing messages named DataSource. Each generated message will be appended to this array (this action is like sending a message to the server). And to do that, we'll create a helper class – and name it ChatHelper, to separate concerns appropriately. The didChange variable is used to fire a signal whenever a new message is created. Welcome to the world of reactive programming, now natively built into Swift.
class ChatHelper : ObservableObject {
    var didChange = PassthroughSubject<Void, Never>()
    @Published var realTimeMessages = DataSource.messages

    func sendMessage(_ chatMessage: Message) {
        realTimeMessages.append(chatMessage)
        didChange.send(())
    }
}
Now, we will go to the main content of this section – Chat View. Let's create a file named ChatView and declare the following properties:
@State var typingMessage: String = ""
@EnvironmentObject var chatHelper: ChatHelper
typingMessage is the latest message that was lastly typed in by the user, and chatHelper is an object that manages and retrieves the data (our mock API object introduced above). Next, move to the body section, add the following lines of SwiftUI code:
VStack {
    List {
        ForEach(chatHelper.realTimeMessages, id: \.self) { msg in
            MessageView(checkedMessage: msg)
        }
    }
    HStack {
        TextField("Message...", text: $typingMessage)
            .textFieldStyle(RoundedBorderTextFieldStyle())
            .frame(minHeight: CGFloat(30))

        Button(action: sendMessage) {
            Text("Send")
        }
    }.frame(minHeight: CGFloat(50)).padding()
}
Well, obviously, SwiftUI makes our code much easier to read and visualize. We will not explain anything in the above code to challenge you. Your challenge is to visualize our screen from that block of code. Not a big deal, right? Important note: Because we use List, Message and User we need to implement the Hashable protocol to uniquely identify each row in the list.
struct Message: Hashable {...}
struct User: Hashable {...}
To make the UI more eye-catching, perhaps we won't need separator lines, you can do the following
init() {
    UITableView.appearance().separatorStyle = .none
    UITableView.appearance().tableFooterView = UIView()
}
And here is the sendMessage function:
func sendMessage() {
    chatHelper.sendMessage(Message(content: typingMessage, user: DataSource.secondUser))
    typingMessage = ""
}
Next, for someone who has been working with iOS for a long time like you, leaving the navigation blank is very annoying, isn't it? Let us help you.
NavigationView {
    VStack{...}
        .navigationBarTitle(Text(DataSource.firstUser.name), displayMode: .inline)
}
Believe it or not, you're going to get to the destination. What we need to do is updating some configuration in the SceneDelegate file. At the first line inside the willConnectTo function, declare an environmentObject:
func scene(_ scene: UIScene, willConnectTo session: UISceneSession, options connectionOptions: UIScene.ConnectionOptions){
    let chatHelper = ChatHelper()
}
Inside the same function, we are going to tell the compiler our rootViewController is UIHostingController(rootView: chatView.environmentObject(chatHelper))
let chatView = ChatView()

// Use a UIHostingController as window root view controller.
if let windowScene = scene as? UIWindowScene {
    let window = UIWindow(windowScene: windowScene)
    window.rootViewController = UIHostingController(rootView: chatView.environmentObject(chatHelper))
    self.window = window
    window.makeKeyAndVisible()
}
Now, let's compile and run our screen.
Looking for a custom mobile application?
Our team of expert mobile developers can help you build a custom mobile app that meets your specific needs.
Get in TouchConclusion
That's it. Building a SwiftUI chat app for iOS is not as hard as it looks like. Of course with a real chat application, everything will be a lot more complex for sure. But for the purposes of this tutorial, you and we can feel how much SwiftUI has helped us. Indeed, if done with UIKit, we will certainly take a lot more time and effort for repetitive, not meaningful tasks (especially for experienced people) such as drag and drop, register cell, reusing cells, caching images, etc. Hopefully you have learned something more interesting about SwiftUI from this hands-on experience rather than the sterile academic theory. Here is the complete source code on Github (Please give us a Star ❤️️ ). And stay tuned! In the next tutorial, we will continue to improve this SwiftUI chat app!