How to Implement a Navigation Drawer in SwiftUI
Welcome back to a new tutorial of our SwiftUI series. In this tutorial, we are going to learn how to implement a navigation drawer in SwiftUI, also know as side menu, side bar menu or hamburger menu. If you have ever worked with it in UIKit, you will understand its nature thoroughly. We will simply create a ViewController and assign it as a quick navigator.

Before getting into it, we would like to make sure that you do not miss any of our previous articles related to SwiftUI – they are extremely clear, concise and helpful. Let's get started.
1. Create the Navigation Drawer SwiftUI Component
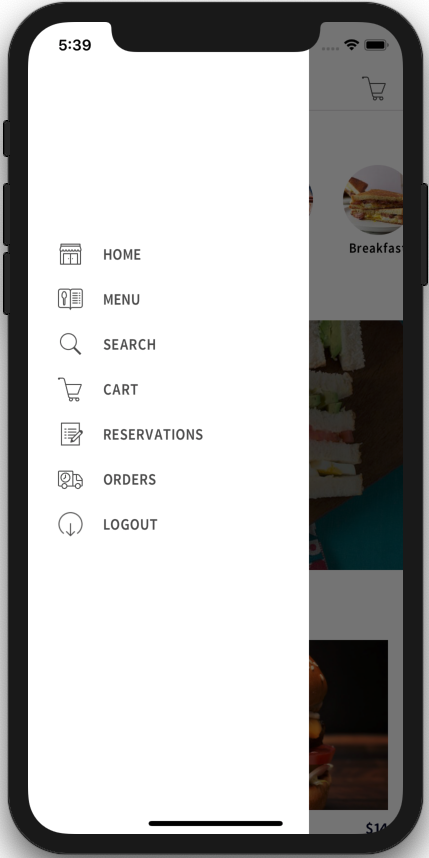
In this first step, we are going to create two things. The first one is the content of the navigation drawer. This will usually be a list of screens that users can navigate to. You could see an example in the image below. This is one of our templates where we implemented the navigation drawer.
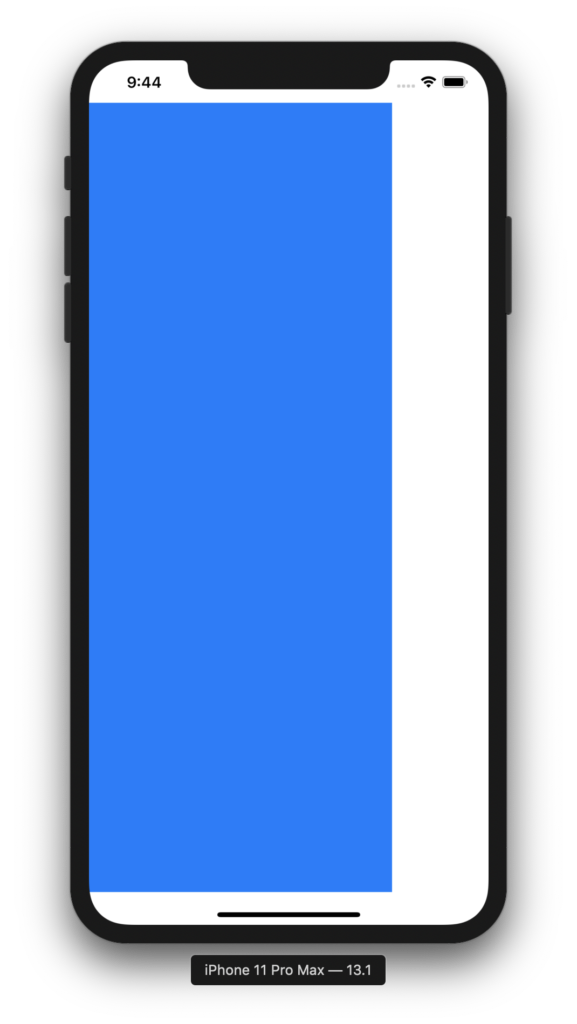
To keep this tutorial simple, we only create a simple view with a background color. Here's the SwiftUI code snippet:
struct DrawerContent: View {
    var body: some View {
        Color.blue
    }
}
Ship faster with All Access. Get the Swift templates, admin panels, updates, and launch bonuses that help you build faster.
Explore All AccessThe second part is the underlying padding. Its responsibility is to take care of tasks such as frames, transitions, opacities, borders, etc. In general, one view can do both tasks, but it's better to split it up because the DrawerContent view can be very complex.
struct NavigationDrawer: View {
    private let width = UIScreen.main.bounds.width - 100
    let isOpen: Bool

    var body: some View {
        HStack {
            DrawerContent()
                .frame(width: self.width)
                .offset(x: self.isOpen ? 0 : -self.width)
                .animation(.default)
            Spacer()
        }
    }
}
Through the above code, we achieve the following:
- We embedded our DrawerContent inside NavigationDrawer through a HStack.
- We've also made the frame for it. You can adjust the width as you want. isOpen is a property telling us if our navigation drawer is currently visible or not. Changing this flag will also change the visibility of the navigation drawer menu accordingly.
Ship faster with All Access. Get the Swift templates, admin panels, updates, and launch bonuses that help you build faster.
Explore All Access2. Adding the Navigation Drawer to the ContentView
In this step, all that's left to do is to add the ability to call this function from the main view – our ContentView.
Add this block of SwiftUI code into the ContentView's body:
struct ContentView: View {
@State var isDrawerOpen: Bool = false
var body: some View {
ZStack {
/// Navigation Bar Title part
if !self.isDrawerOpen {
NavigationView {
EmptyView()
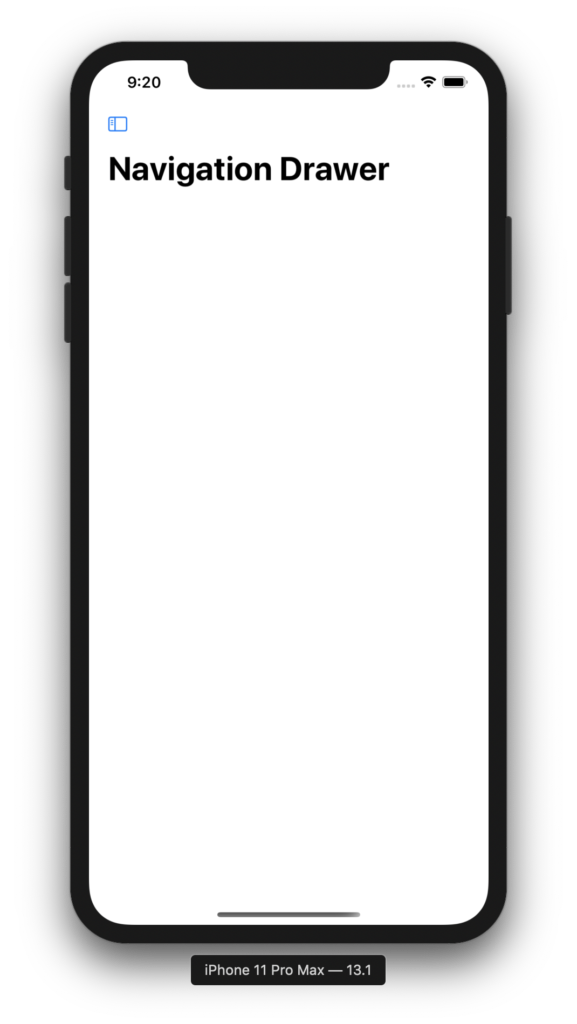
.navigationBarTitle(Text("Navigation Drawer"))
.navigationBarItems(leading: Button(action: {
DispatchQueue.main.asyncAfter(deadline: .now() + 0.2) {
self.isDrawerOpen.toggle()
}
}) {
Image(systemName: "sidebar.left")
})
}
}
/// Navigation Drawer part
NavigationDrawer(isOpen: self.isDrawerOpen)
/// Other behaviors
}.background(Color.white)
.onTapGesture {
if self.isDrawerOpen {
self.isDrawerOpen.toggle()
}
}
}
}
Don't panic! This block of code looks quite wordy but it is relatively simple. We're going to explain it step by step.
First, let's take a look at the block of code including the NavigationView below.
NavigationView {
    EmptyView()
        .navigationBarTitle(Text("Navigation Drawer"))
        .navigationBarItems(leading: Button(action: {
            DispatchQueue.main.asyncAfter(deadline: .now() + 0.2) {
                self.isDrawerOpen.toggle()
            }
        }) {
            Image(systemName: "sidebar.left")
        })
}
It declares a navigation bar with the title and a left item which is a button. Tapping on that will trigger our drawer. asyncAfter is just used for making the slide out animation more smooth – nothing special here.
Now, this is the most important part – how to emit a signal to show or hide the navigation drawer. As you can see, in the ContentView, the navigation bar only appears when isDrawerOpen is false. That means the navigation drawer is getting hidden.
Tapping on the button will update the isDrawerOpen value. Then, we will pass the latest value into the NavigationDrawer. And once the NavigationDrawer receives the signal, it will update its frame correspondingly.
NavigationDrawer(isOpen: isDrawerOpen)
Lastly, we just handle one more small behavior. Tapping anywhere on the screen to dismiss that view. All set! Build and run to see this feature.
Looking for a custom mobile application?
Our team of expert mobile developers can help you build a custom mobile app that meets your specific needs.
Get in Touch3. Conclusion
In this tutorial, you learned the basic concepts needed to implement a navigation drawer in SwiftUI. In an actual iOS app, you'd create a complex view instead of just simply coloring the background. Check out the final source code on Github for more details. Please don't forget to star our Github repository if you've found this tutorial helpful.
We hope you've enjoyed reading it! If you have any questions or comments as you work through this SwiftUI tutorial, feel free to comment below or ask us here. Thanks so much and be sure to stay tuned for more tutorials!