Core Components
ATCGenericCollectionViewController
This is our generic class that displays most of the screens and sub-screens – an extremely powerful UIViewController. Most of our screens (view controllers) are inheriting from ATCGenericCollectionViewController. By having your own view controllers subclass this generic view controller, you’ll get a lot of functionality for free. This view controller is an enhanced regular view controller, with a lot more features built-in:
-
Support for Any Types of Data Sources (Rest API, Firebase, AWS, GraphQL, hardcoded static data, disk, etc)
-
We achieve this by passing a generic data source as the source of truth for the data displayed in the view controller (see ATCGenericCollectionViewControllerDataSource below)
-
Support for Any Types of UI Cells (achieved through the core adapter pattern detailed below)
-
Flexible Sizes for Cells
-
Cached Sizes to Boost Scroll Performance
-
Pagination
-
Pull to Refresh
-
Empty State
-
Embedded Generic Collection View Controllers
- This is extremely useful for embedding in carousels, grids, page controls, etc, which are generic view controllers themselves, with their own data sources.
-
Flexible Layouts (including the Pinterest-like liquid layout)
-
Dark Mode / Themed Coloring
You can find these classes in Core/ViewControllers.
To instantiate a generic view controller, all you need to do is pass in its configuration, which is a struct with the following params
struct ATCGenericCollectionViewControllerConfiguration {
    let pullToRefreshEnabled: Bool
    let pullToRefreshTintColor: UIColor
    let collectionViewBackgroundColor: UIColor
    let collectionViewLayout: ATCCollectionViewFlowLayout
    let collectionPagingEnabled: Bool
    let hideScrollIndicators: Bool
    let hidesNavigationBar: Bool
    let headerNibName: String?
    let scrollEnabled: Bool
    let uiConfig: ATCUIGenericConfigurationProtocol
    let emptyViewModel: CPKEmptyViewModel?
}
ATCUIGenericConfigurationProtocol
This protocol describes our core UI configuration object. Each app has a single object that conforms to this protocol, and specified the main colors and fonts that are used in the app. With these classes, we achieve theming (for dark mode), and at the same time, it makes customizations extremely easy, since you’re able to redesign the whole app by simply changing this file.
Here’s an example of our Chat UI configuration file looks like for the chat app:
class ChatUIConfiguration: ATCUIGenericConfigurationProtocol {
    let colorGray0: UIColor = UIColor.darkModeColor(hexString: "#000000")
    let colorGray3: UIColor = UIColor.darkModeColor(hexString: "#333333")
    let colorGray9: UIColor = UIColor.darkModeColor(hexString: "#f4f4f4")

    let mainThemeBackgroundColor: UIColor = UIColor.modedColor(light: "#ffffff", dark: "#121212")
    let mainThemeForegroundColor: UIColor = UIColor(hexString: "#3068CC")
    let mainTextColor: UIColor = UIColor.darkModeColor(hexString: "#000000")
    let mainSubtextColor: UIColor = UIColor.darkModeColor(hexString: "#7e7e7e")
    let statusBarStyle: UIStatusBarStyle = .default
    let hairlineColor: UIColor =  UIColor.darkModeColor(hexString: "#d6d6d6")

    let regularSmallFont = UIFont.systemFont(ofSize: 14)
    let regularMediumFont = UIFont.systemFont(ofSize: 17)
    let regularLargeFont = UIFont.systemFont(ofSize: 23)
    let mediumBoldFont = UIFont.boldSystemFont(ofSize: 17)
    let boldLargeFont = UIFont.boldSystemFont(ofSize: 23)
    let boldSmallFont = UIFont.boldSystemFont(ofSize: 14)
    let boldSuperSmallFont = UIFont.boldSystemFont(ofSize: 11)
    let boldSuperLargeFont = UIFont.boldSystemFont(ofSize: 29)
}
You’ll notice that this protocol is injected into most of the UI components (cells, adapters and views) as part of the constructors. This is extremely important, since it allows us to theme any view that is displayed in the app.
So it’s highly encouraged that you inject this uiConfig object into all the custom views and cells that you create.
Core Adapter Pattern
This is one of the most important concepts used in our apps, and make sure you understand it properly, since understanding this will make it 10x easier to navigate our codebase.
Most of the screens in a robust mobile app are very complex, so a regular view controller with a table view is not enough, since it doesn’t scale. Things like pull to refresh, loading data from a backend API, paginating that data, caching, etc. are very common and needed on almost all the screens. Since we don’t want to repeat this code into all the classes, we encapsulated all these duplicate logic into ATCGenericCollectionViewController (detailed above).
Now, as part of this generic view controller, we are also tackling an important UI use case: displaying different types of cells into the same collection view.
Normally, you would do this in the dedicated collection view delegate method:
override func collectionView(_ collectionView: UICollectionView, cellForItemAt indexPath: IndexPath) -> UICollectionViewCell {
 // if let user = object[indexPath] as? User return UserCell()
 // if let post = object[indexPath] as? Post return PostCell()
 // etc..
}
But this doesn’t scale in more complex apps, since you’d need to duplicate a lot of code. For simple screens, displaying only a single type of cell, this works great. But when you add multiple types of cells, including containers for carousels and grid views (which are view controllers themselves, with remote data sources even, and which have different heights), things get nasty.
This approach also does not allow you to reuse cell configuration steps, which you would duplicate across all your view controllers (setting colors, setting texts, setting image URLs, etc.). So if you have a cell (let’s say “UserViewCell“) which is used in a lot of your screens, you’d need to duplicate the code for populating a UserViewCell in absolutely all view controllers that are using it.
To address these two pain points, we used the adapter pattern. An adapter is a simple plain object that transforms a model object into a cell object. It works with any view controller that inherits from our ATCGenericCollectionViewController.
For a view controller, you simply specify which adapters you want it to use, and the view controller will use them “magically”:
viewController.use(adapter: adapter, for: "ModelClass")
This tells the viewController, that every time it needs to display an object of type ModelClass, it will use adapter to build the correct UI cell and display it on the screen. It will also use adapter to decide what’s the height and width of the cell.
Let’s consider the example of ATCProfileViewController, which is a generic view controller displaying the profile of the current user:
self.use(adapter: ATCProfileItemRowAdapter(uiConfig: uiConfig), for: "ATCProfileItem")
self.use(adapter:ATCRoundImageRowAdapter(), for: "ATCImage")
self.use(adapter: ATCDividerRowAdapter(titleFont: uiConfig.regularFont(size: 16), minHeight: 10), for: "ATCDivider")
self.use(adapter: ATCProfileButtonItemRowAdapter(uiConfig: uiConfig), for: "ATCProfileButtonItem")
self.use(adapter: InstaMultiRowPageCarouselRowAdapter(uiConfig: uiConfig), for: "InstaMultiRowPageCarouselViewModel")
By looking at this code, we can tell that the view controller can display multiple types of cells, backed by various models, such as Images, Dividers, Profile Items, Profile Buttons, and even a Carousel (which hosts its own embedded view controller).
Things have become much cleaner, and the best part is that you can reuse these adapters in many other screens, without duplicating code. But the truly best part, is that for collection views with cells of flexible sizes, there’s some magic caching going on under the hood, that improves the scroll performance incredibly.
To implement your own adapter, all you need to do is to create a plain old NSObject (PONSO), and conform it to the ATCGenericCollectionRowAdapter protocol:
protocol ATCGenericCollectionRowAdapter: class {
    func configure(cell: UICollectionViewCell, with object: ATCGenericBaseModel)
    func cellClass() -> UICollectionViewCell.Type
    func size(containerBounds: CGRect, object: ATCGenericBaseModel) -> CGSize
}
By implementing these 3 methods, you’ll be able to configure the UI cell correctly, based on the value of the underlying model (object). You’ll also specify the size of the cell, which can be a fixed size or a computation based on the size of the container frame as well as the underlying model (flexible sizes, yay!).
As an example, here’s our core Story adapter, the adapter used to display Instagram-like Story units:
class ATCStoryAdapter: ATCGenericCollectionRowAdapter {
    let uiConfig: ATCUIGenericConfigurationProtocol
    init(uiConfig: ATCUIGenericConfigurationProtocol) {
        self.uiConfig = uiConfig
    }

    func configure(cell: UICollectionViewCell, with object: ATCGenericBaseModel) {
        guard let viewModel = object as? ATCStoryViewModel, let cell = cell as? ATCStoryCollectionViewCell else { return }
        cell.configure(viewModel: viewModel, uiConfig: uiConfig)
    }

    func cellClass() -> UICollectionViewCell.Type {
        return ATCStoryCollectionViewCell.self
    }

    func size(containerBounds: CGRect, object: ATCGenericBaseModel) -> CGSize {
        return CGSize(width: 100, height: 100)
    }
}
Notice how we injected a uiConfig object, so that we propagate it further down to the cell, in order to realize color theming (e.g. use dark background when in dark mode, and white background when in light mode).
Building Your Own Cell / Adapter
In order to create your own views, there are basically 4 quick steps:
- Create a UICollectionViewCell subclass (ATCStoryCollectionViewCell in the example above)
- Create a ATCGenericBaseModel subclass as the model (which might be empty if there’s no data being stored – ATCStoryViewModel in the example above)
- Create the adapter class, transforming the model into a cell (ATCStoryAdapter in the example above)
- Have the view controller use the new adapter:
viewController.use(adapter: MyAdapter(), for: "MyModel")
Data Sources – ATCGenericCollectionViewControllerDataSource
A data source is an object that specifies to a view controller what data it needs to display. The source of that data can be anything, but the view controller (the UI layer) is agnostic to that. In other words, our view controllers don’t know WHERE the data comes from, but only know WHAT data they need to display. The adapters (detailed above) dictate HOW the data should be displayed.
The job of “WHERE the data comes from” is for the data source. In practice, data can come from a ton of different sources, such as:
- REST API
- GraphQL
- Firebase
- AWS
- Microsoft Azure
- Parse Server
- CoreData
- Realm
- Disk files
- SQL Database / SQLite
- Hardcoded static data
- Various SDKs (e.g. Backendless, Serverless, etc)
- WooCommerce / Shopify / WordPress
- …
We’ve built the generic data source so that you can integrate ANY type of backend extremely easily.
By having all of our view controllers work with a single generic data source, we made it possible for you to change the backend of the app without modifying any code in the screens themselves. You only need to implement your data source and plug it in. Let’s see how.
Any data source needs to conform to this protocol (you can find it in Core/ViewController):
protocol ATCGenericCollectionViewControllerDataSource: class {
    var delegate: ATCGenericCollectionViewControllerDataSourceDelegate? {get set}

    func object(at index: Int) -> ATCGenericBaseModel?
    func numberOfObjects() -> Int

    func loadFirst()
    func loadBottom()
    func loadTop()
}
The methods are pretty much self explanatory. The delegate is usually the view controller itself (the generic view controller is already conforming to all the methods of ATCGenericCollectionViewControllerDataSourceDelegate).
- loadFirst() – this method is called first, when there’s no data currently displayed – so this is the first request to the server, if a server is involved
- loadTop() – this is called when pull to refresh happens (so you can fetch new objects, that get displayed at the top) – leave empty if there’s no need for pull to refresh
- loadBottom() – this is used for pagination and infinite scroll (you can load more objects as the user scrolls down). Leave empty if there’s no need for pagination
- numberOfObjects() – this should return the total number of objects currently displayed on the screen
- object(at index: Int) – this returns the object that needs to be displayed in the position index
Notice how all these objects are conforming to ATCGenericBaseModel, making any data source compatible with any generic view controller.
You can find plenty of data source implementations available in our templates. Simply search the project for “data source”:
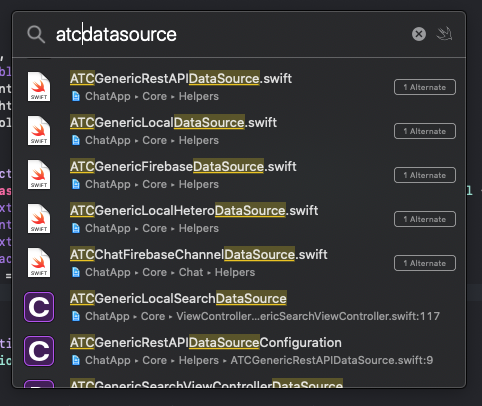
A few common data sources, we’ve already included in the app:
- ATCGenericFirebaseDataSource– this is used for fetching a stream of objects from a Firebase Firestore collection
- ATCGenericRestAPIDataSource – this is used for fetching data from a REST API endpoint
- ATCGenericLocalDataSource – this is used as the data source for hardcoded static data (no networking), where all the data has the same type:
For example, showing the drawer menu only needs a static list of menuItems:
ATCGenericLocalDataSource<ATCNavigationItem>(items: menuItems)
- ATCGenericLocalHeteroDataSource – this is used as the data source for hardcoded static data (no networking), where the data items are of different types. For example, in a profile screen, you’d need to display various items, such as:
...
var allItems: [ATCGenericBaseModel] = []
if let user = user {
    allItems.append(ATCImage(user.profilePictureURL, placeholderImage: UIImage.localImage("empty-avatar")))
    allItems.append(ATCText(text: user.fullName()))
}
allItems.append(contentsOf: self.items)
allItems.append(ATCProfileButtonItem(title: "Logout".localizedCore,
                                     color: nil,
                                     textColor: uiConfig.mainTextColor))
self.genericDataSource = ATCGenericLocalHeteroDataSource(items: allItems)
self.genericDataSource?.loadFirst()
...
Notice how we display an ATCImage, an ATCText, followed by some other array of random items, followed by an ATCProfileButtonItem.
To create or use your own data source, follow these steps:
- Implement a new object conforming to ATCGenericCollectionViewControllerDataSource (let’s call it MyDataSource)
- Assign an instance of this data source to the view controller
viewController.genericDataSource = MyDataSource()
Make sure viewController conforms to ATCGenericCollectionViewController
- Load the first batch of items from the data source:
viewController.genericDataSource?.loadFirst()
- Make sure all object types (models) returned by the data source have a proper adapter assigned in the view controller, otherwise the app will crash. So, let’s say our new data source returns some new objects of a new type Animal. You’ll need to create an AnimalAdapter and assign it to the view controller, prior to calling “loadFirst“. (refer to the Core Adapter Pattern for more details).
viewController.use(AnimalAdapter(), for: "Animal")
ATCHostViewController
ATCHostViewController is the container view controller hosting all the screens in the app. It is basically the entry point of the view layer, being the backbone of our apps.
It handles a few common and important jobs, such as:
- Main navigation
- Orchestrates the flow between Walkthrough, Login, Registration (Onboarding) and the logged in experience (the main view controllers)
- Various other jobs such as updating location, triggering biometry check, invalidating persistent credentials, etc.
In your app, you’ll notice another view controller that’s built on top of the host view controller. Identify that controller (which has “hostViewController” in its name) and take a look (for example, for the chat app, the class is ChatHostViewController). You can find the name of this view controller in your AppDelegate, since it’s assigned as the rootViewController.
Onboarding Screens
By default, all of our apps have a login gate when the app is opened. Users need to go through the walkthrough flow when they open the app for the first time, and then register or login. We show all these flows by default. But you can easily change that.
ATCHostViewController retrieves an onboardingCoordinator parameters in its constructor. If you pass nil there, there won’t be any type of login.
return ATCHostViewController(configuration: config, onboardingCoordinator: nil, walkthroughVC: nil, profilePresenter: nil)
But since in most cases, you do want an onboarding process (great growth strategy!), you can configure the onboarding flow by simply configuring its underlying object, the onboarding coordinator. By default, we have our own onboarding coordinator: ATCClassicOnboardingCoordinator. You can modify this one, or you can create your own.
You can do this in the main host view controller of your app, where the onboarding coordinator is being created:
fileprivate func onboardingCoordinator(uiConfig: ATCUIGenericConfigurationProtocol) -> ATCOnboardingCoordinatorProtocol {
   ...
   return ATCClassicOnboardingCoordinator(landingViewModel: landingViewModel,
                                           loginViewModel: loginViewModel,
                                           phoneLoginViewModel: phoneLoginViewModel,
                                           signUpViewModel: signUpViewModel,
                                           phoneSignUpViewModel: phoneSignUpViewModel,
                                           resetPasswordViewModel: resetPasswordViewModel,
                                           uiConfig: ChatOnboardingUIConfig(config: uiConfig),
                                           serverConfig: serverConfig,
                                           userManager: userManager)
}
Main Navigation
All the main navigation items are being passed in via a ATCMenuConfiguration object into the host controller. Identify that in our app (in the host view controller detailed above) to change the navigation items & configuration of your app:
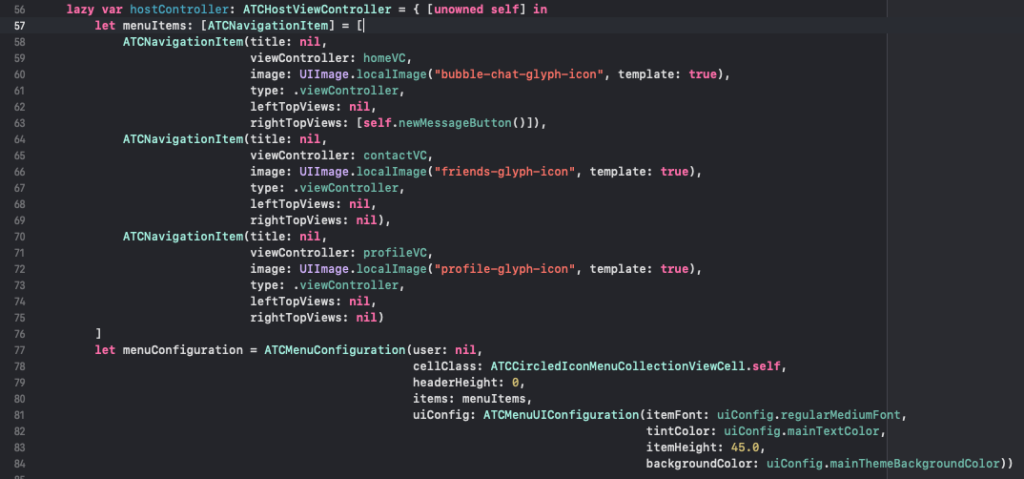
In this case, for example, you can see the app contains 3 menu items, none of which have title, but images only (bubble chat icon, friends icon and profile icon).
By looking at this code:
let config = ATCHostConfiguration(menuConfiguration: menuConfiguration,
                                  style: .tabBar,
                                  topNavigationRightViews: nil,
                                  titleView: nil,
                                  topNavigationLeftImage: UIImage.localImage("three-equal-lines-icon", template: true),
                                  topNavigationTintColor: uiConfig.mainThemeForegroundColor,
                                  statusBarStyle: uiConfig.statusBarStyle,
                                  uiConfig: uiConfig,
                                  pushNotificationsEnabled: true,
                                  locationUpdatesEnabled: false)
you can basically see that the navigation of this app is using tabs, has push notifications enabled, and there are no user location updates.
Changing the style from .tabBar to .sideBarwill change your navigation to a sliding side drawer, rather than tabs. Enabling location updates will start updating the user’s location into the Firebase collection automatically. Changing the uiConfig colors will change the colors in absolutely all UI elements. You get the point. Play around with the configurations to customize your app as you see fit.
Face ID / Touch ID
If enabled, biometry authentication is being handled in ATCHostViewController as well:
private func biometricAuthentication(user: ATCUser) {
    ...
}
Logout
The host view controller also has built-in functionality to trigger a logout operation. All you need to do to log a user out, is this line of code, called from anywhere in the app:
NotificationCenter.default.post(name: kLogoutNotificationName, object: nil)
The host view controller will automatically handle everything for you, including clearing our the login credentials, wiping out the user session and transitioning the app to the logout screens.